You've got to check out the Clearance Rack from Stampin' Up! It's amazing. Right now they have punches that are up to 80% off. Remember, it's only while supplies last!
Stampin' Up! demonstrator site and online store
Thursday, December 15, 2011

Saturday, December 10, 2011
Stampin' Up! demonstrator site and online store
I am very excited to say that I now have my own web site where you can order right on line, see what events are coming up, and get ideas! Stop on by and take a look! Stampin' Up! demonstrator site and online store
Wednesday, December 7, 2011
Chapstick holder
I am so stinkin excited! I have been racking my brain on Christmas gifts, and what to make for weeks now. I had a few ideas in mind, but wasn't sure how to go about making them. So I decided to just type in to google one of my ideas. "Chap stick holder." There are a ton of ideas and tutorials out there, but when I came across "Create! with Dee"s tutorial I knew this was the perfect one. She was so simple to understand, and it was visual for me, and so much better than what I had in my mind.
Here's my version of her "Chap stick holder".


Here's my version of her "Chap stick holder".

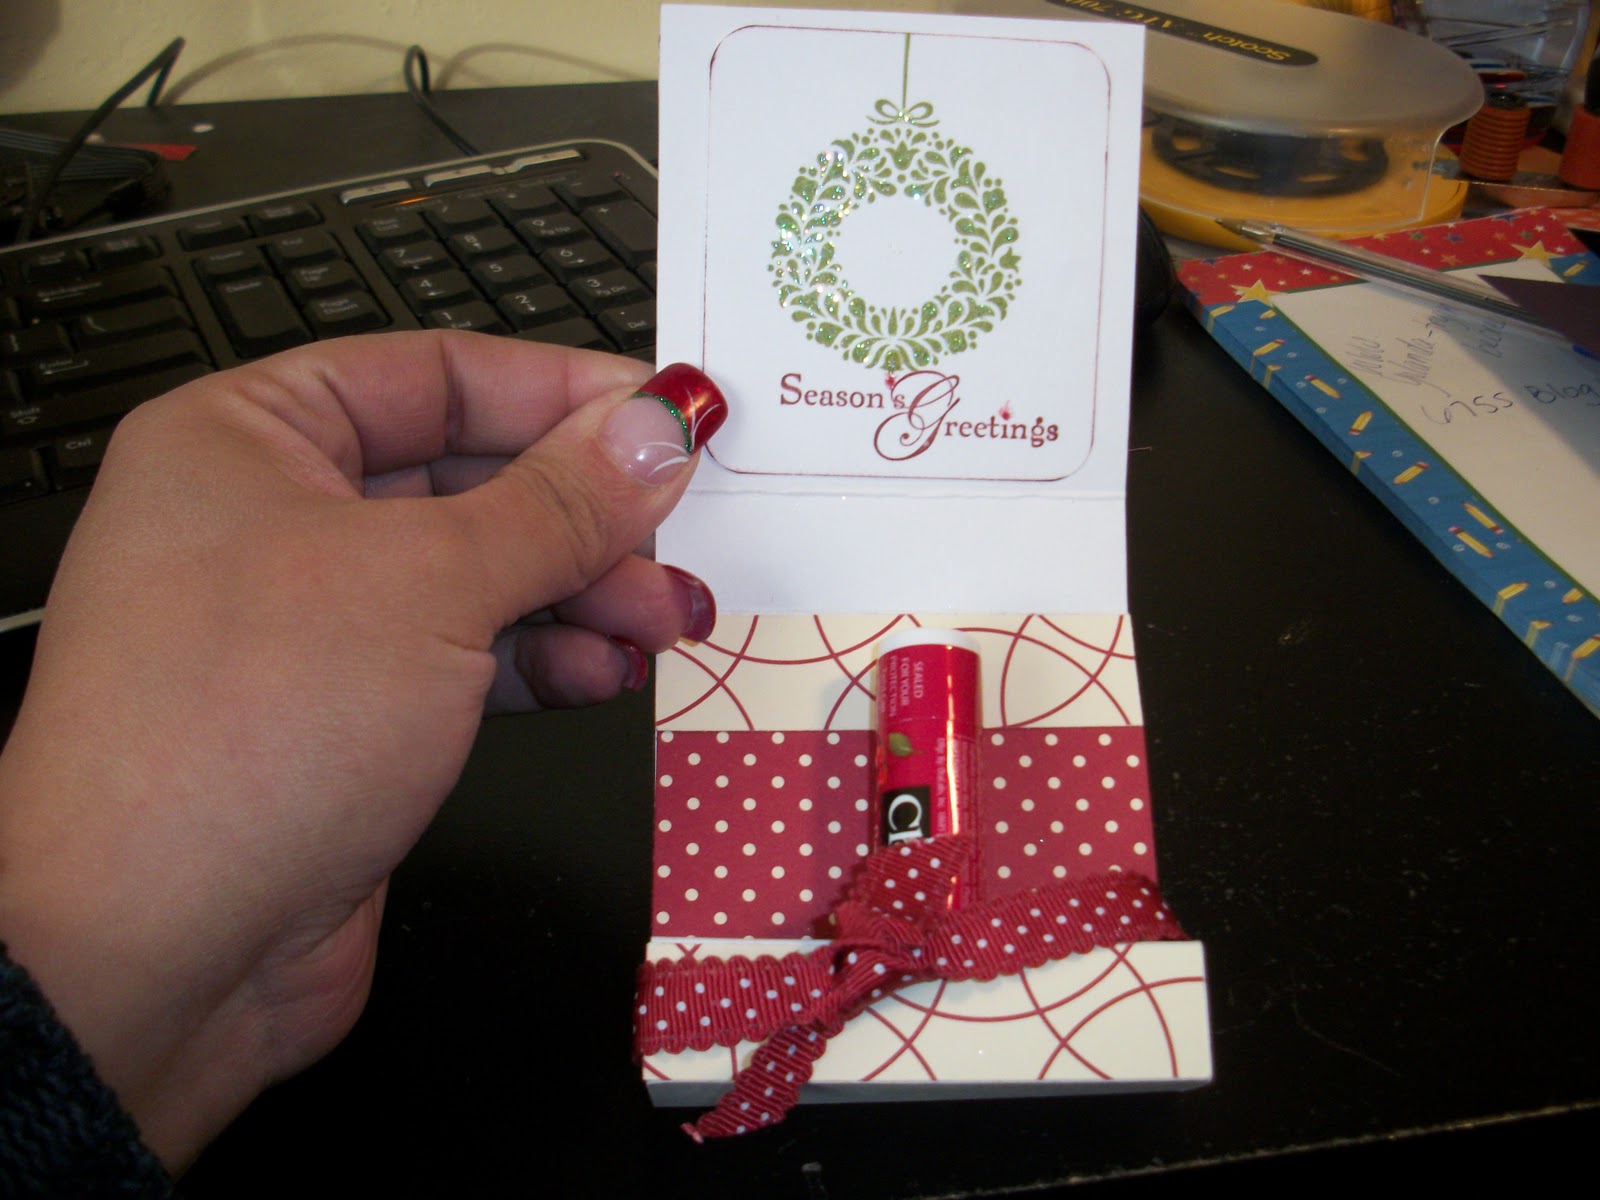
I used the new Cherry Cobbler scalloped ribbon, (124138), the Northern Hearts stamp set,(retired), and the Snow Swirled stamp set, (111690). Dazzling diamonds (102023), the 3/4" circle punch, (119873), the NEW Simply Scored Scoring Tool, (122334), and retired DSP.
I have to say that I LOVE our new scoring board. I have the Martha Stewart one and there's no comparison. The simply scored is so much smoother to use. The stylus isn't moving from the grooves, and my lines are perfectly straight. It's the best tool (other than the my Big Shot) that I have bought from Stampin Up! If you'd like to order any of these products, leave me a message and I'll get right back to you!
Thanks as always for stopping by! I always love comments, and any feed back is always appreciated! Oh, and before I forget, if your interested in the tutorial I used, you can find it here.
Tuesday, December 6, 2011
As promised...
In my last post I mentioned that I would show the prizes that I had for my Advent Calendar event. First let me say that it was a ton of work to put it all together, but it was so great to see the finished product in the gals hands. They were so proud of what they had done, and they really did turn out amazing! I was very excited about the entire thing.
Now, for my prizes. I made some tile magnets using the retired "Define your life" stamp set. I love that stamp set! It was actually the one I picked for free when I signed up as a demonstrator. So I'm glad that I could still use it. I did bake my tiles for 30 minutes after stamping them up with Staz-on. (I read somewhere that sets the ink.) Then the very next day I read that your not suppose to bake staz-on because of a harmful fume. I'm not sure which is right, so if you ladies know, let me know which is correct. Thankfully no one was harmed. (LOL).

The next prize I did was a beautiful ribbon book mark. I found that on Dawns website. I LOVE HER!!! She shows you how to make it, super simple! You can find that here.
 Next, I just made random Christmas tags. I used all of my Christmas punches, the stocking punch, the ornament punch, and whatever else I found. Here they are.
 Super, super, simple little prizes. I think everyone was excited with what they picked. I wrapped them all up in little goodie baggies.
 Super simple and fun! If you haven't already seen my advent calendar, here's what that looked like too.
 Cased it right out of the Mini catalog. It was very time consuming the first time. Having to write all the directions, measurements, colors, shapes. Wow! Anyhow, I love how it turned out, and I think the ladies all loved it too. They really are cute!
Well as always, thanks for stopping by!
Now, for my prizes. I made some tile magnets using the retired "Define your life" stamp set. I love that stamp set! It was actually the one I picked for free when I signed up as a demonstrator. So I'm glad that I could still use it. I did bake my tiles for 30 minutes after stamping them up with Staz-on. (I read somewhere that sets the ink.) Then the very next day I read that your not suppose to bake staz-on because of a harmful fume. I'm not sure which is right, so if you ladies know, let me know which is correct. Thankfully no one was harmed. (LOL).

The next prize I did was a beautiful ribbon book mark. I found that on Dawns website. I LOVE HER!!! She shows you how to make it, super simple! You can find that here.


Well as always, thanks for stopping by!
Saturday, December 3, 2011
Dryer sheet technique
So every month I have a technique class. That means that I spend a ton of time looking around for a unique techique that I hope they haven't heard about. Last night, I showed them the dryer sheet technique. I think it went over pretty well, EXCEPT, the one time I had procrastinated all night to set up everyone showed up early. Somehow FB put my event for 6:00 on some pages, and 7:00 on my page. So other than not having everything out and ready for everyone to stamp, I think the technique went well, but I have learned a valuable lesson. I won't procrastanate even if I think I have plenty of time. (thankfully my club gals were really sweet about it.)
Anyway, here's the card that we did last night using a dryer sheet.
 I used Old Olive cardstock, ribbon and ink. White CS, versa mark, and silver embossing powder. The stamp set is Snow Swirled. First on the Old olive CS I stamped snowflakes using old olive ink. Then you tie your ribbon around the card. Next, using versa mark stamp your greeting, add silver embossing powder over it and emboss. Then taking your white CS you stamp your image in Old Olive ink, get a glue stick and cover the entire piece of white cs with glue. Next put your dryer sheet on top of it, smooth it out and either cut it down to fit, or as I did cut it down but leave enough to fold your sides down in back. I think it gives it a more finished look if it's folded behind, but it looks nice cutting it down too. Next, sprinkle on alot of dazzling diamons, (I coverd my enitre white CS) and then shake it off. The dazzling diamonds will stick to the glue and dryer sheet, and gives a very pretty sparkly effect. I kinda thought it looked like snow. (The really pretty one when it first snows, and you wake up to it when the sun is just shining, and nobody has walked on it.) It made a beautiful christmas card.
I would love to see what you come up with, send me your blogs, and I"ll add a link so others can see what else you can do with dryer sheets. Thanks as always for stopping by! Stay tuned for my post on the prizes I gave out for my Advent Calendar Event. I think they all turned out super cute.
I also entered this card into a blog hop. Take a look at all of these beautiful cards! .
Anyway, here's the card that we did last night using a dryer sheet.

I would love to see what you come up with, send me your blogs, and I"ll add a link so others can see what else you can do with dryer sheets. Thanks as always for stopping by! Stay tuned for my post on the prizes I gave out for my Advent Calendar Event. I think they all turned out super cute.
I also entered this card into a blog hop. Take a look at all of these beautiful cards! .
Tuesday, November 29, 2011
Finally...my new craft room!!
It has been some time since I have updated my blog. I've been busily working on projects, and cards, and of course trying to organize my new craft room. It's taken a LONG time to get my new space organized and things put where I wanted and of course clearing out my old craft space. WOW!! That's all I can say. I can't believe how much stuff one can accumulate in such a short amount of time. I'd like to say I am completely finished, but I'm certain that I will find something else I need to re-arrange, or a must have that I'll have to move things around for. I wanted to wait and take pictures of my space when it was entirely clean and organized, but I've realized that will never, ever happen. So, here's my new space.
 Finally, I'm upstairs! I love the sunlight, and having a huge window to look out from.


 That door opens up to the bathroom.


 The cute little girl is my youngest, and she just had to be in these pictures!
 Here's my great work/craft table. I can now hold my classes in my craft room. LOVE IT!!
I LOVE touring other people's craft rooms, but for some reason, when I try to upload a video, it won't work. So I hope these pictures make sense. Next, I am having an advent calendar class. That will be on December 1 at 9:30 am. Lunch will be served and we'll have some drawings! Then December 2 is my technique night. Stay tuned for pictures of that technique. It's a new one (to me) that I thought was awesome! I would of never thought to use my "garbage", but for this technique, that's exactly what we'll do. Come and find out more. That's on Friday at 7 pm my house.
As always, thanks for stopping by, and leave me a comment. They always make my day! :)


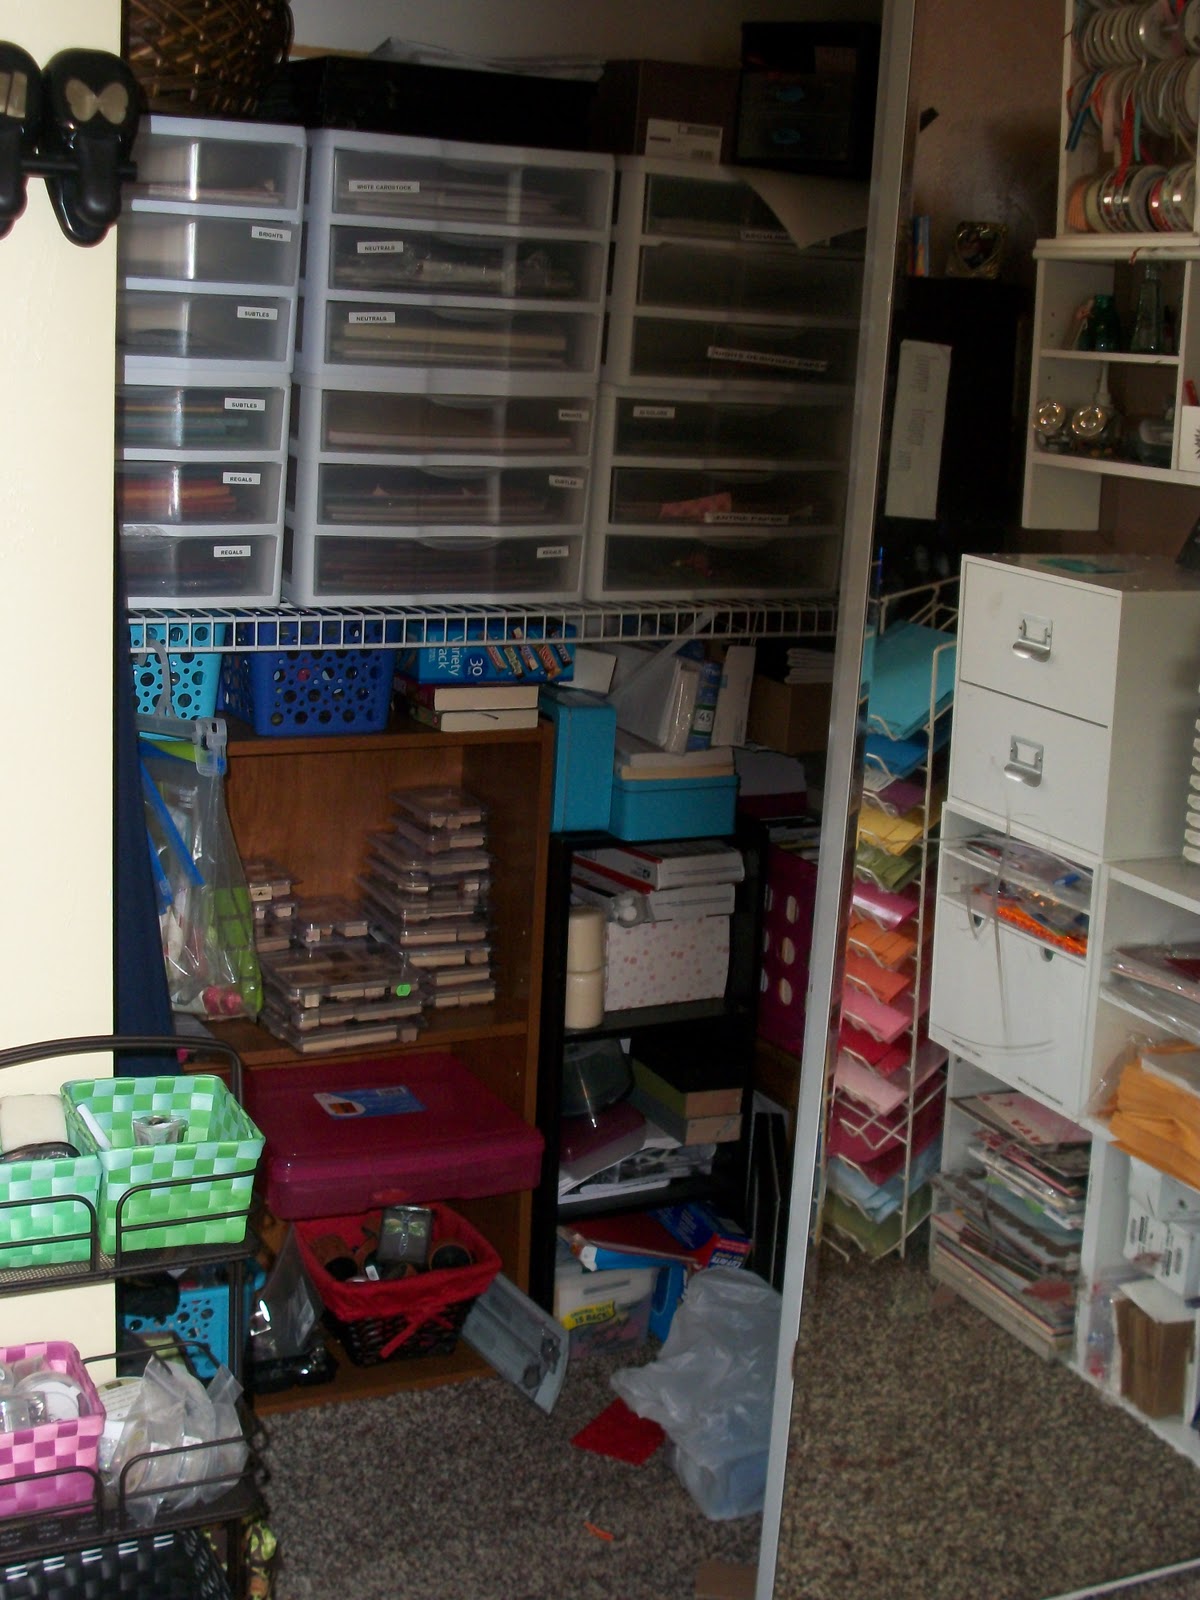


I LOVE touring other people's craft rooms, but for some reason, when I try to upload a video, it won't work. So I hope these pictures make sense. Next, I am having an advent calendar class. That will be on December 1 at 9:30 am. Lunch will be served and we'll have some drawings! Then December 2 is my technique night. Stay tuned for pictures of that technique. It's a new one (to me) that I thought was awesome! I would of never thought to use my "garbage", but for this technique, that's exactly what we'll do. Come and find out more. That's on Friday at 7 pm my house.
As always, thanks for stopping by, and leave me a comment. They always make my day! :)
Thursday, November 17, 2011
I love it when things just kinda fall into place. Yesterday I went to the DI (a second hand store here in Utah) just cause I needed to get out of the house and didn't have a ton of money to spend, and I love looking for stuff. So anyhow, yesterday while I was there, I found a card kit from Stampin Up! that someone had sent there, (what were they thinking??!!) and had to buy it. I came home and got to work on a Christmas card. Here's what I came up with.

 Very simple, but I wanted to stick with what I got in the kit. I just had to provide the ink, the stamps, and of course the glitter. I think they turned out pretty good, and for quiet a steal! WOOHOO me!
Thanks for stopping by, and I'd love to know what you think.


Thanks for stopping by, and I'd love to know what you think.
Subscribe to:
Posts (Atom)