Saturday, August 2, 2014

My convention Swaps...

Like usual I'm always a little behind on my posts.  Today I want to share the swaps I made for convention.  This was my 3rd convention, so I decided I would make 300 cards to swap.  It took a lot of time, but it was great when I had it all done.

Being that I get bored easily, I made six different swaps.  For this one I used, Pacific Pointe CS, Tempting Turquoise CS, and of course Whisper White CS.  Inks, Pacific Pointe, Coastal Cabana, and Real Red.  Accessories, Decorative Dots embossing folder, the Circles Collection framelits, and the 1" circle punch.


For this next card I used Coastal Cabana for my base, White CS, and Pumpkin Pie CS.  Stamp sets, Yippee-Skippee, and Polka Dot Pieces.  Punches, Elegant Butterfly punch, Scallop Circle punches, and the Banners framelits,and the fun part, Stampin Spritzer, mixed with water and pumpkin pie reinker.  The ink colors are Pumpkin Pie, Coastal Cabana,Old Olive, and Whisper White ink. 
This card I made in several different colors, but only photo'd this card.  I used the Tap tap tap stamp set.  I water colored the inside of the type writer using the Aqua Painters.  I used the banners framelits, and the scallop edge punch.  
This card was pretty simple.  I used the banner punch, the chevron embossing folder, the All Abloom DSP, Silver Glimmer paper, and a hand held circle punch.
My last card I used the "Another Thank you" stamp set.  I tried out a new technique.  (not sure the "technical" name) but in this technique I used my markers, the largest clear block I had, and my Stampin' Spritzer.  I colored each color marker on my block, then generously sprayed my bock and put it down on my paper.  I did this for each card, so each card came out differently.  I set aside each card and let it dry over night.  Then I used my staz -on and stamped the image using the World Map image.  Then for the banner I used the Another Thank You stamp set,and the largest banner framelit.  

I had another card, a baby card, but can't seem to find a picture of it.  I'll post it later if I find it.  As you can see, I kept changing card designs.  It's impossible for me to of enjoyed making 300 of the same cards.  I had my favorites, and a couple that I didn't love, so it surprised me when so many gals picked the one or two cards that I didn't love.  Good lesson learned however, not everyone loves what I love.  I'll keep that in mind for my workshops.

Thursday, July 31, 2014

My first kid friendly workshop...

My kids have been begging and begging to have friends over to do a craft with their friends.  I've put it off and had a ton of reasons to not be able to do it, finally I got some really cute ideas from some swaps at convention and decided that it was time I did a workshop with  my kids and their friends. (The Minion card I photo'd from a friends swaps, I'll check again to see if there's a name on the card to give credit to someone, but I don't have the card.  The chipboard card had no name on the back.)

 First we made some invitations and invited several of their friends.  (I forgot to take a pic of the invite, it wasn't anything fancy though.)

Then we prepped for the big day!  I wish I had thought to take pictures of my kiddo's working hard to get everything ready.  (lesson learned, I learned a few of them today with this workshop.  :))  


I used a retired stamp set for this coloring project, stazon ink (101406) , ribbon, (retired) and glue dots (103683).  Daffodil Delight CS (119683), Wisteria Wonder CS (122922), White CS (100730), Island Indigo CS(122923),
and Black CS (121045).  On top of of those different colors, there was several punches, and die cuts to use. 
 The little 3D item we made was using the retired milk carton die, the decorative dots embossing folder, (133520) and sticky red strip, (104294) and of course my beloved Big Shot (113439).  We put candies inside of it and they took it home to their moms to say thank you.
 Look at these happy, cute kiddo's!  We had a great turn out, and I think everyone left here very happy and hands full.  (tummy's too.  They ate an entire bag of pretzels, and grapes!)


If you'd like to order anything from the Stampin" Up! Catalog, please go to http://forthelove.stampinup.net
Any questions, leave me a comment, and I'll get back to you asap.  If you're interested in a workshop or hosting a workshop, go to the above link.  Thanks as always for stopping by.  

Friday, July 25, 2014

Paper Pumpkin-50% OFF YOUR FIRST TWO MONTHS...


When you subscribe by September 10th.  Use Promo Code: HALFOFF2 (for new members only.)

Each month a fully designed project kit arrives at your door with stamps, ink, and paper- everything cut and ready to go.  After your first 2 months, keep the creativity coming for only $19.95 us/$24.95 ca + tax per month (shipping included).  It's convenient and low risk-you can put it on hold or cancel anytime.  Visit www.MyPaperPumpkin.com  to sign up.  Don't forget to choose me as your demonstrator.   (Yolanda Cook)

Thursday, May 22, 2014

First Baby Mini Album

I'm so exited with how my first ever baby album turned out.  This is actually my 3rd  mini album, and  I'm loving it!

 Here's the front cover.

This is the inside of the front cover.  I added a pocket for the tags, and then a spot on the front for a photo.  The tags are big enough for journaling.
This page is my FAVORITE one.  This is made using 3 envelopes.  The front cover here, you can put a picture on, then you flip it open, and here's what the inside looks like.
Room for a picture on the top piece, journaling or photo's on the middle piece, and more journaling on the bottom, and incase that's not enough for you, I've included a pocket for two tags on the back of the page.
This album has more pages, pockets, tags, and space for memento's, photo's, and journaling.  I LOVE how it looks.  I've found a new addiction.  In the next day or two I'll try to post my very first ever mini album.  I love, love, love making these!

Saturday, February 15, 2014

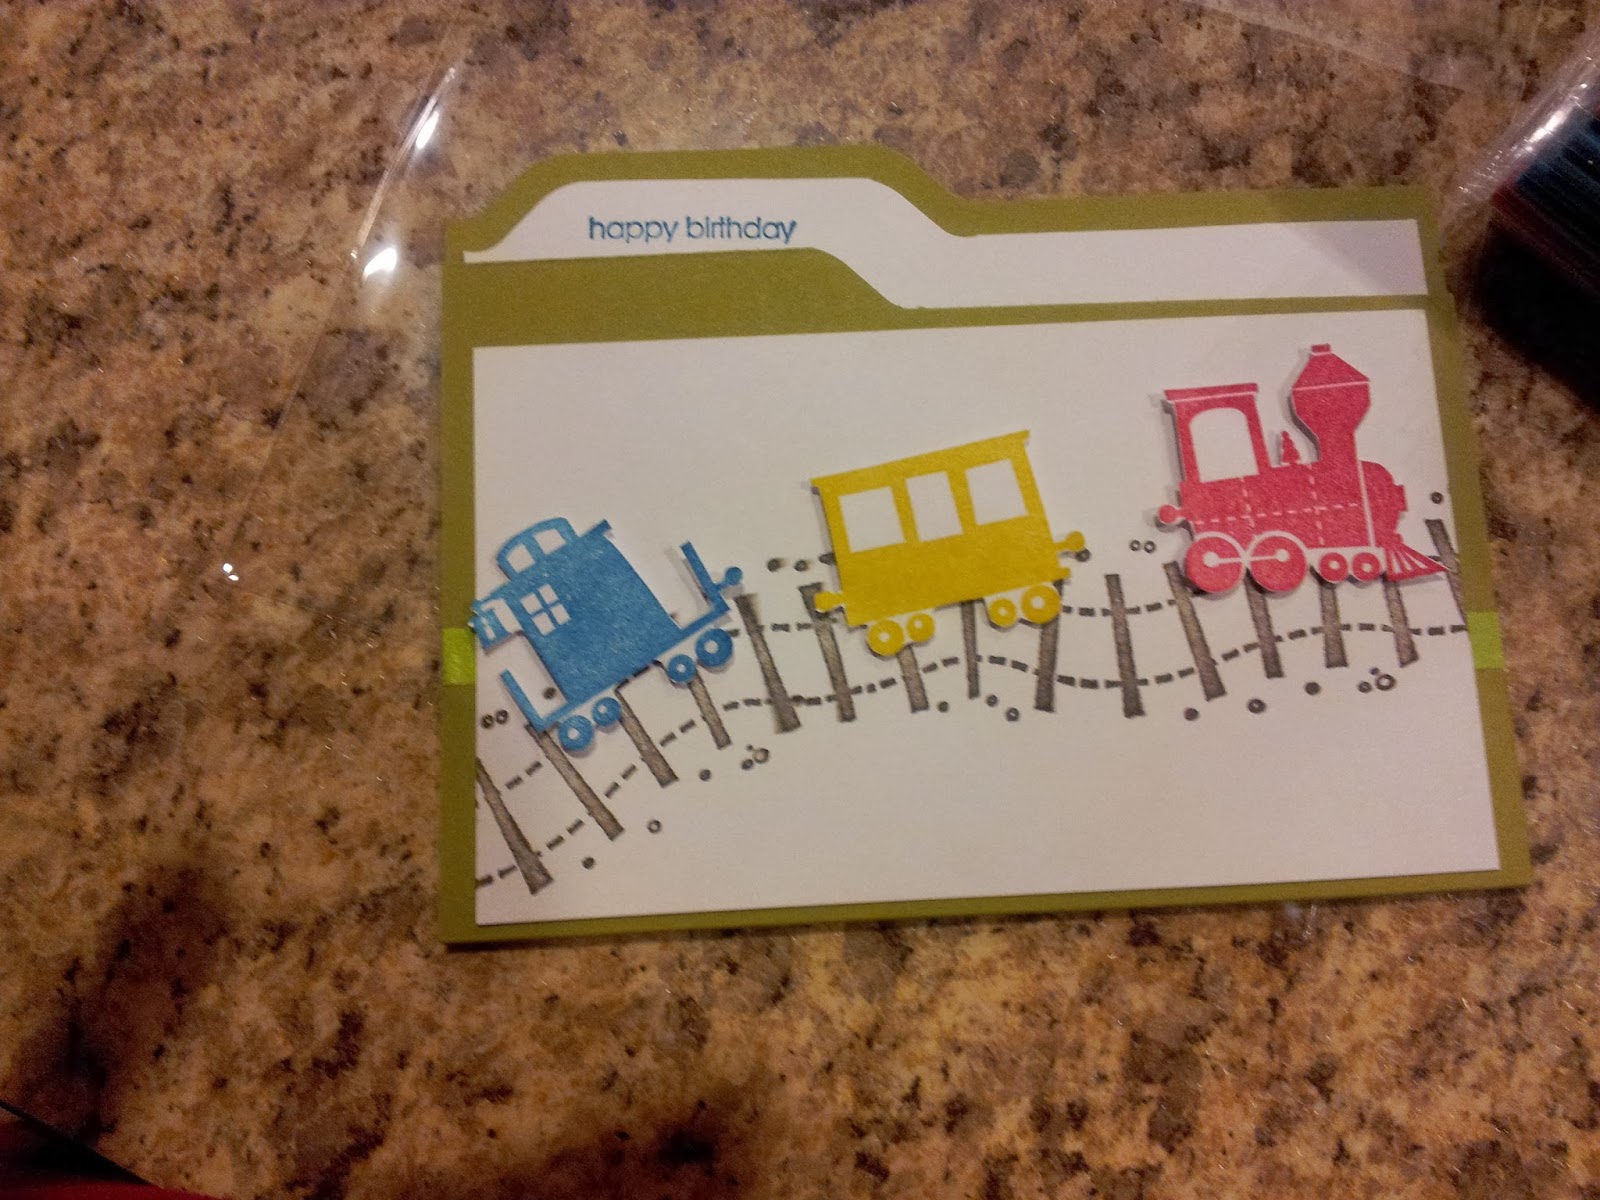
Birthday Invites.

I was asked recently to make some Birthday Invites for a soon to be three year old's birthday party, using a train theme.  Thanks to Stampin Up!  I had a perfect idea and the best colors to pick from.  (I think it may be time to become a demonstrator again).


Didn't those  turn out cute!  I'm so excited about these.  Stay tuned, I am working on a birthday banner now, for the same soon to be birthday boy.  I have some great ideas rolling around in my head.  We'll see if they work out on paper.

Monday, February 3, 2014

Valentines Decor

Wowzers!  I'm never gonna be on top of my posting like I'd planned.  Life just gets too crazy busy.  I've got several things to post all at once, so here we go.

I made these adorable valentine's cards for one of my card swaps.


Aren't these the cutest?!  I found the tutorial on You tube.  You can find it here.  I love, love, love Dawn!  She does a fabulous job with her tutorials and makes it so easy to follow her.  

Next, I finally made it to the Wood Connection.  It's been too long since I've been, so I was like an addict in the candy store.  I finished one of my projects, but still have another one I am working on.  
 I've just noticed that jar on the left is empty.  It did have Valentines M&M's in it, but obviously the kiddo's have raided the stash.
I love how the glittery heart turned out.  This entire project was so simple.  I used some of my Stampin Up! stash.  I loved, loved, loved, this paper when I first bought it.  I loved it so much I haven't wanted to use it for anything.  (Heaven forbid I run out of it.)   This project was perfect for it.  I can display it year after year, and see my paper.  :) 

Next, I made these super simple candles.  I should say heated these candles.  I love the simplicity of this project so much that I am planning on having candles to trade out for each holiday.  I had Halloween ones that I'm pretty sure I posted on here, and somehow didn't get around to making Christmas ones.  What do you think?  Cute right.

If your interested in this project let me know.  Or you can google the technique I'm sure.  Have a great Valentine's Day!  

Wednesday, January 22, 2014

Time is going by too fast...

Wow, the day's are just flying by.  I made a goal to stay up to date with my blog and already I'm failing miserably!

Let's see, I've opened up my own Etsy store.  You can find me at at taking a break, just click on the highlighted link.  I love creating and have so many things I would like to post, with life being so crazy for every one I thought it would be easier to have my own Etsy store, though we've still got www.Avaravendesigns.etsy.com.  So stop on by either store and see what we've got going on.  The taking a break store I plan on adding a lot more paper crafts, so if there's some thing you've seen on my blog, odds are I'll have it at my Etsy store.  Next, I've got several post to catch up on, so I'll start catching up on that now.

First, in December I helped in my son's 4th grade classroom Christmas party.  My job was to come up with a craft, and bring all of the supplies and do a craft with them.  I was a little overwhelmed trying to brain storm ideas that would be simple enough for 30 + 9 year old's to do, but fun too.  I thought about making min marshmallow snowflakes, and my son thought that would be a blast.  Then a friend of mine showed me these crazy cute snowman she had made, and whalla.  We had a craft.  They were so simple to make and all of the kids loved making them.  It was definitely a hit at my son's party.

Aren't those the cutest snowman you've ever seen?!  Here's how you make them, super simple.  You'll need socks, ( I bought men's large socks.)  rice, fabric for the scarf, tooth picks for the nose, rubber bands,(3 per snowman) and any other accessories you would like to add.  (buttons, eyes, gems, ribbon, etc.) On one I added googly eyes, and the others I used a permanent black marker to add eyes, and mouth.

Take a sock, and fill the bottom 1/3 with rice.  Then you tie it off with a rubber band, and do the next level the same way, tie it off, and then the 3rd level.  Leave a little bit of sock so that when you tie the rubber band, you can fold some of the sock over and make a hat.  You can tie a ribbon around the top of the hat to decorate it a bit more.  Now, it's time to decorate your snowman.  Simple, simple simple.  One thing I did do was hot glue my hat down, and added a dab of hot glue in between each layer to keep it from wobbling.  Add some hot glue to the end of a tooth pick, (break it in half) and hot glue it right where the nose should go.  Seriously, a simple, fun, cute, project.  Anyone can do it.

These made really cute Christmas decorations.  Next year we plan on making a ton to share with our family.  These also would make really cute neighbor gifts, (we did get one as a gift.), and a fun project to do with your kids, grand-kids, or at a school party.  Really cute and simple!